
It is very important to read and understand all safety-related materials supplied by TorchRite Solutions and its suppliers before using the Safe-T Torch™ system. The system must be handled by a fully trained torch operator who understands the proper torch and gas safety requirements outlined by local, provincial/state, and federal guidelines, regulations, and laws.
Setup Steps
Secure the mounting bracket to the oxygen cylinder, approximately 10-12 inches or 25-30 centimeters below the regulator, using the strap. Alternatively, remove the strap and use the slots to fasten the bracket to any suitable vertical wall capable of holding 11 lbs or 5 kg.
IMPORTANT: Fasteners for wall connection are not supplied. Ensure that the marking “TOP” on the mounting bracket is at the top when securing it to a cylinder or vertical surface.


Slide the bottom rear openings of the Safe-T Torch™ enclosure down and over the mounting bracket until the enclosure firmly sits at the bottom.

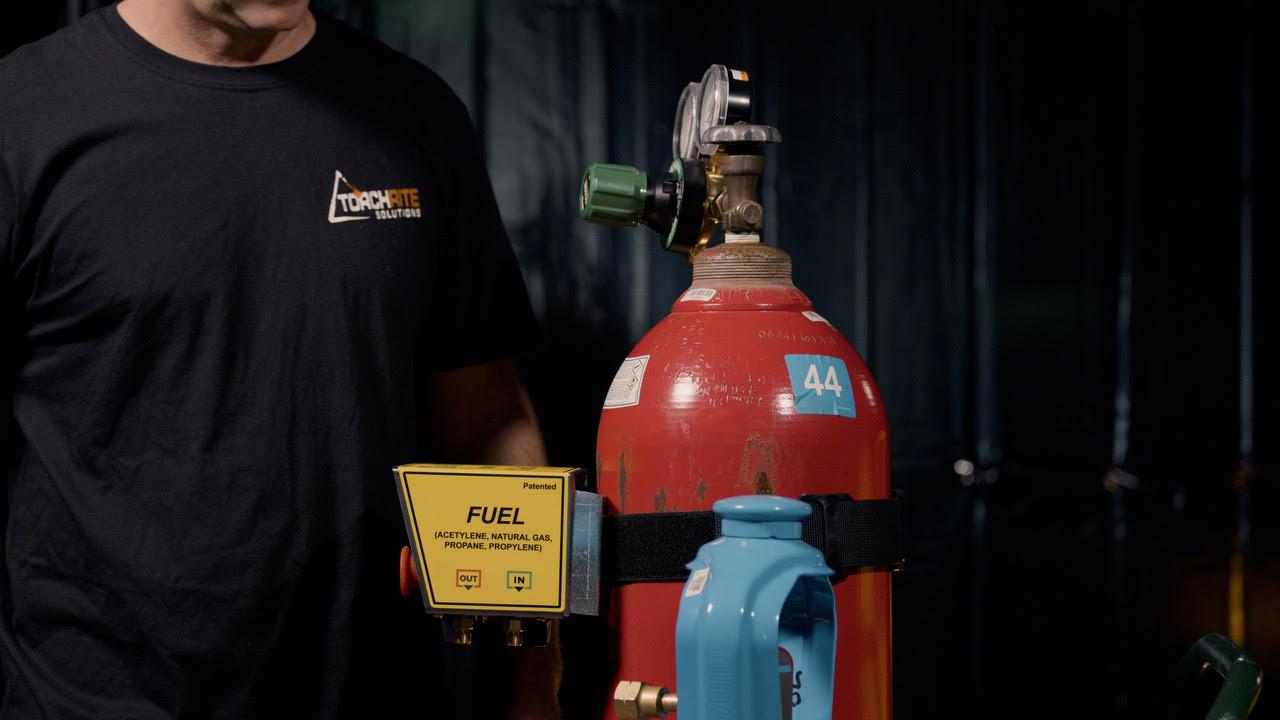
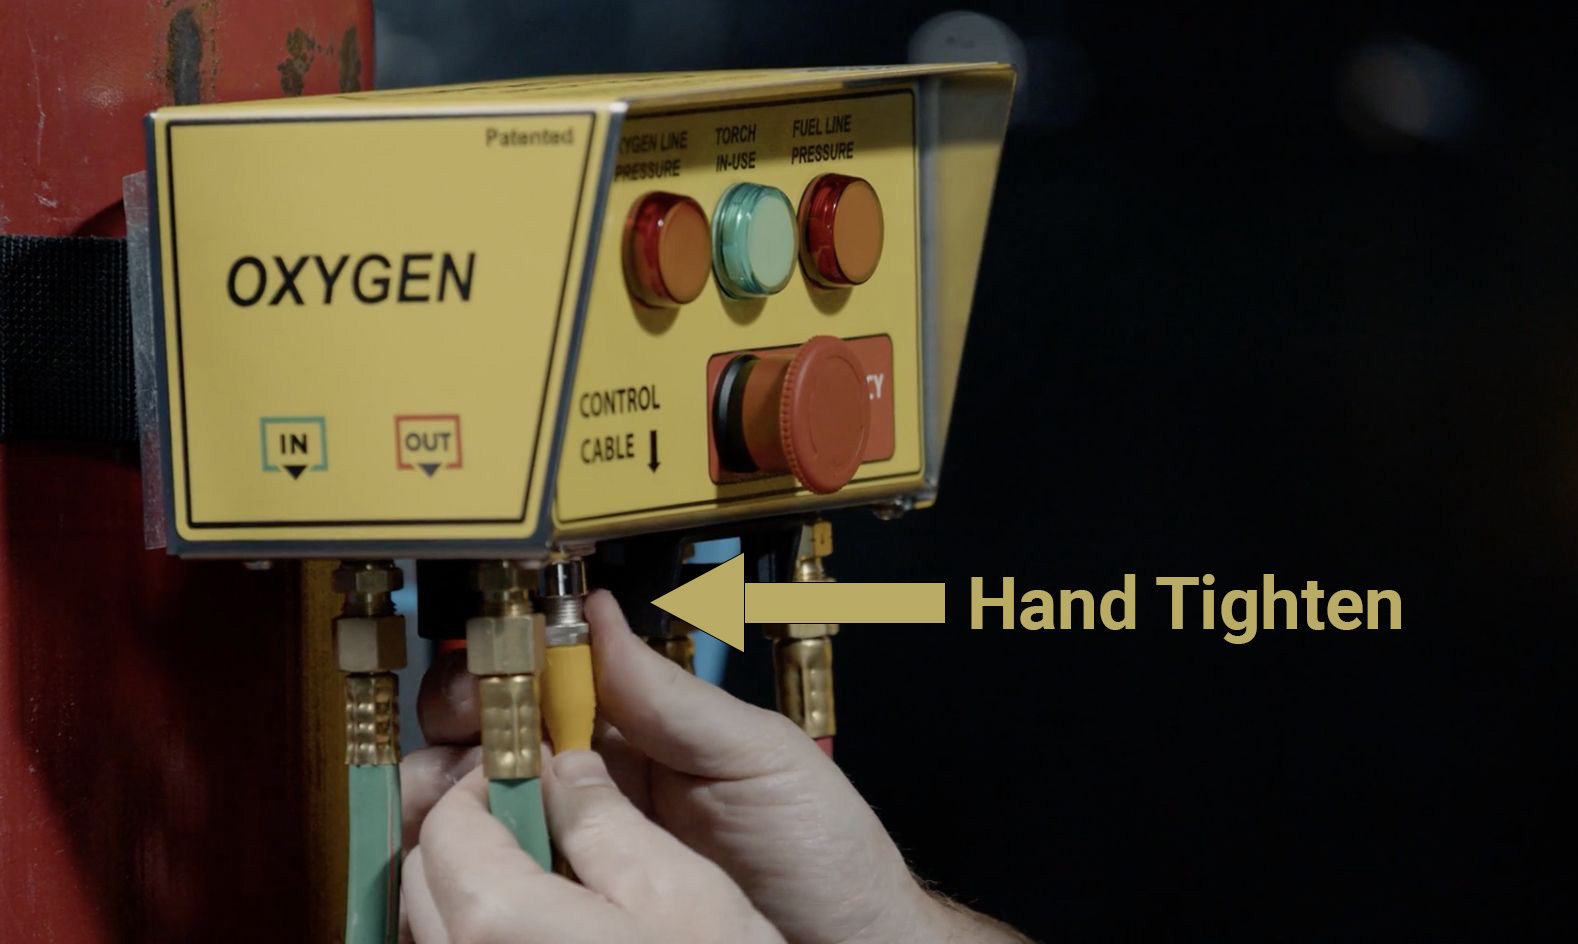
The sides of the enclosure are clearly marked for oxygen and fuel and are designated by “IN” and “OUT” for appropriate hose connections. Attach the 4-foot supply hoses from the regulators to the corresponding fittings at the bottom of the enclosure labelled “IN”, and tighten using a wrench. Repeat this process for connecting the 25-foot, 50-foot, or 100-foot hose to the corresponding fittings at the bottom of the enclosure labelled “OUT”.

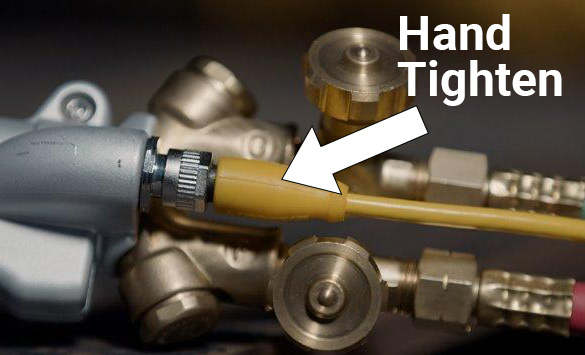
Hand tighten the plug end of the control cord to the socket on the bottom of the Safe-T Torch™ enclosure. This location is clearly marked. The control cord plug and socket are keyed alike. You might need to rotate the plug until it keys into place.
Attach the hoses to the torch handle and tighten using a wrench. Then hand tighten the socket end of the control cord to the plug receptacle on the Safe-T Torch™ handle. The control cord and plug are keyed alike, so you might need to rotate the control cord until it keys into place.

Make sure that the Emergency Stop button on the enclosure is pushed in. This ensures that the system is turned off.

Secure the appropriate torch attachment and cutting tip for cutting or welding to the torch handle, and as per the torch manufacturer’s instructions.

Secure the mounting bracket to the oxygen cylinder, approximately 10-12 inches or 25-30 centimeters below the regulator, using the strap. Alternatively, remove the strap and use the slots to fasten the bracket to any suitable vertical wall capable of holding 11 lbs or 5 kg.
IMPORTANT: Fasteners for wall connection are not supplied. Ensure that the marking “TOP” on the mounting bracket is at the top when securing it to a cylinder or vertical surface.
Slide the bottom rear openings of the Safe-T Torch™ enclosure down and over the mounting bracket until the enclosure firmly sits at the bottom.
The sides of the enclosure are clearly marked for oxygen and fuel and are designated by “IN” and “OUT” for appropriate hose connections. Attach the 4-foot supply hoses from the regulators to the corresponding fittings at the bottom of the enclosure labelled “IN”, and tighten using a wrench. Repeat this process for connecting the 25-foot, 50-foot, or 100-foot hose to the corresponding fittings at the bottom of the enclosure labelled “OUT”.
Hand tighten the plug end of the control cord to the socket on the bottom of the Safe-T Torch™ enclosure. This location is clearly marked. The control cord plug and socket are keyed alike. You might need to rotate the plug until it keys into place.
Attach the hoses to the torch handle and tighten using a wrench. Then hand tighten the socket end of the control cord to the plug receptacle on the Safe-T Torch™ handle. The control cord and plug are keyed alike, so you might need to rotate the control cord until it keys into place.
Make sure that the Emergency Stop button on the enclosure is pushed in. This ensures that the system is turned off.
Secure the appropriate torch attachment and cutting tip for cutting or welding to the torch handle, and as per the torch manufacturer’s instructions.
Our mission is to create safer workplaces for the gas cutting and welding industry by
giving the operators an innovative solution to control dangerous pressurized gases.
© 2025 | TorchRite Solutions™ | All Rights Reserved
Our mission is to create safer workplaces for the gas cutting and welding industry by giving the operators an innovative solution to control dangerous pressurized gases.
© 2025 | TorchRite Solutions™
All Rights Reserved